2Sep, 2024
Cloning a Sitecore Xm Instance, Step by Step
I'm going through a project right now where I need to duplicate some vanilla environments. Due to resource locations being spread out I decided a manual clone was the easiest and fastest path, so today I'll share the process of cloning a Sitecore installation with SQL in Azure, and SOLR in a dedicated VM.
The steps will be duplicating the SQL databases, setting up SOLR, and finally copying the Sitecore installation.
Duplicating SQL Databases
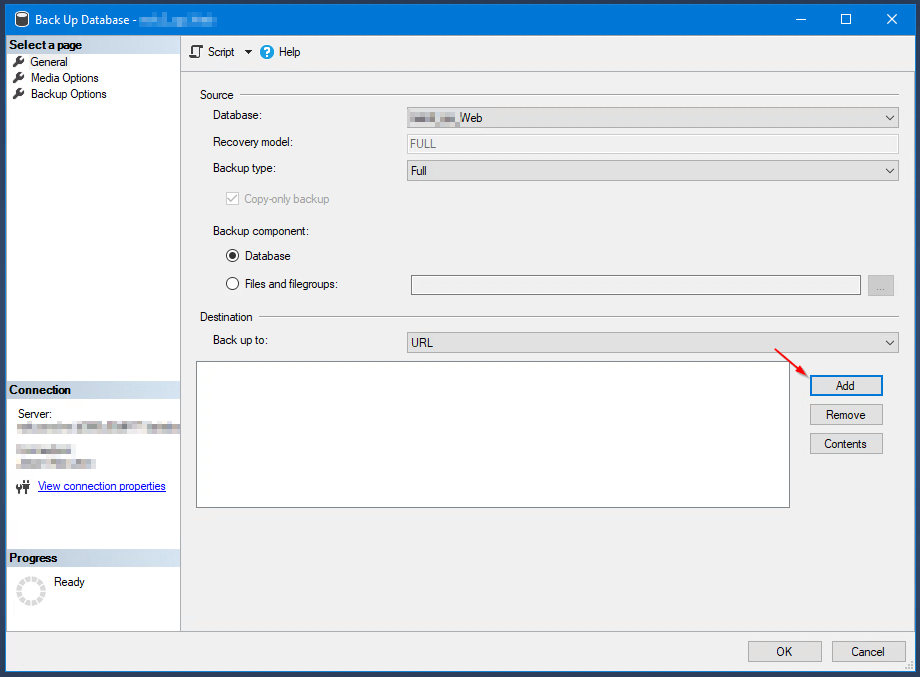
In this case I'm using Azure for SQL, so duplicating the databases should be as easy as a backup and restore. In SSMS, right click on each database and choose Tasks -> Back Up. On this pop up under destination you need to pick a storage container, so click Add to select the right container.


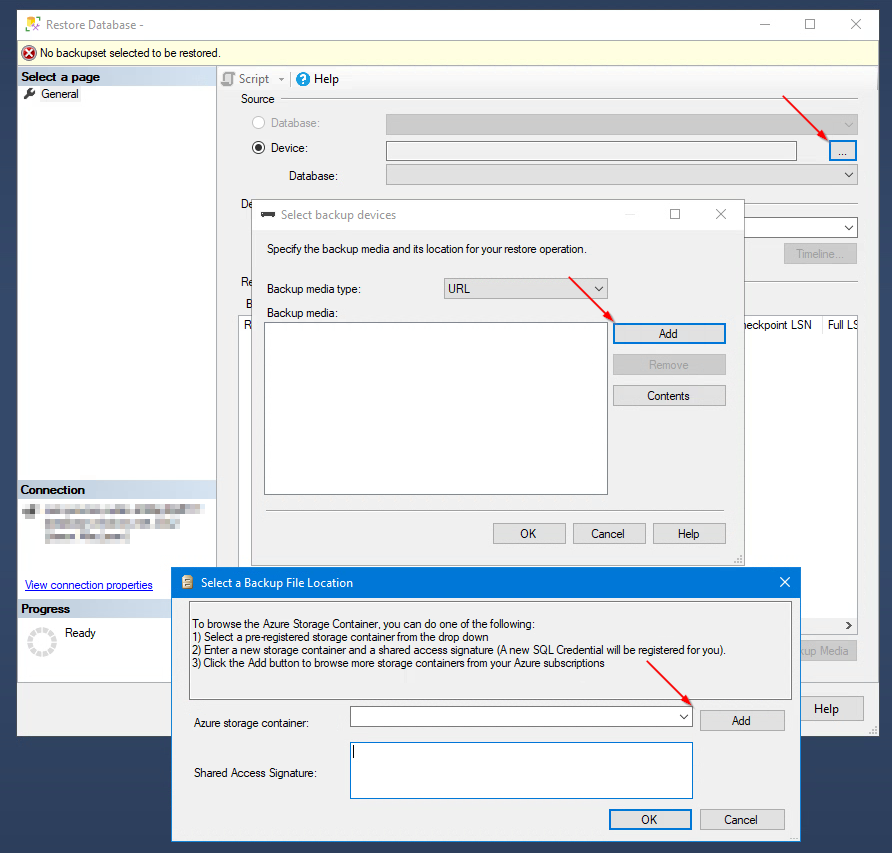
Once all databases are backed up, right click on the Databases node and choose Restore Database. Click to open the Device selection, then Add, then choose the container you just used. You may be asked to log in after selecting Add.

Important Note!
When you're asked to log in, a bunch of MFA steps might kick off. You could be asked to enter a one-time password code, but it won't inform you of which account you're being prompted on, and in my case, I had to enter eight codes. So how can you know which account to use?
The URL of the log in page will begin with https://login.microsoftonline.com/, followed by a Guid. Go to https://portal.azure.com/#settings/directory and compare the directories you see there with the current URL to know which code to enter.
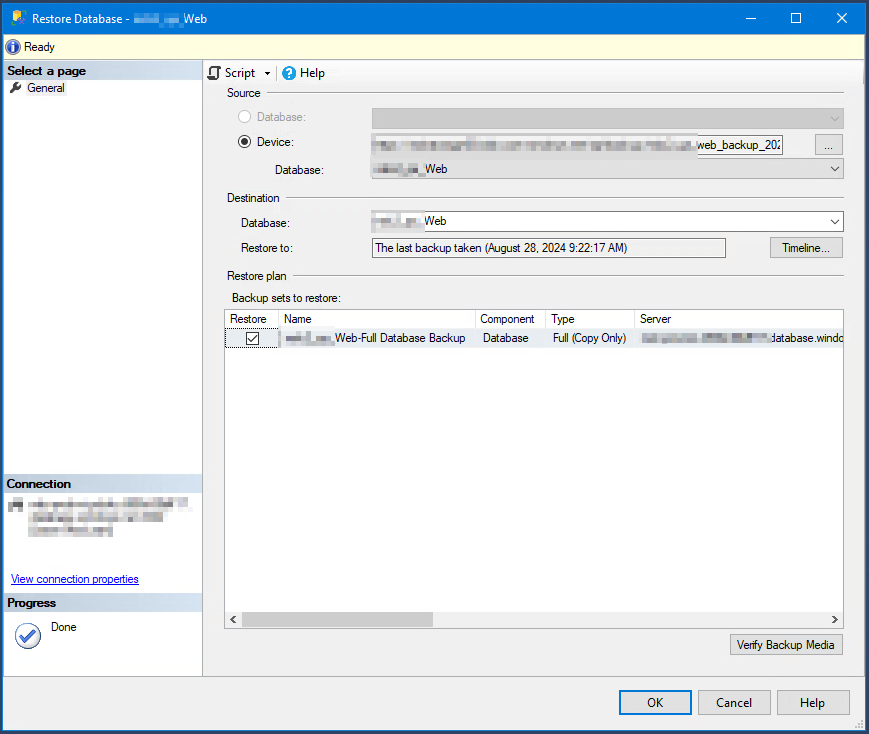
Ok moving on. Once authenticated you can select the storage account you used, and pick the database you're duplicating. The confirmation page will let you you choose a new name for the database. This is the new instance I'm creating today.

Install SOLR
Since we're setting up Sitecore 10.4.0 I'll need SOLR 8.11.2. The downloads area can be hard to find so I just use the common URL structure: http://archive.apache.org/dist/lucene/solr/8.11.2/solr-8.11.2.zip.
Download this file and extract the archive to a new home (I used E:\Apps\solr-8.11.2).
Adding SSL to SOLR
Securing SOLR means installing a certificate and setting it to be used. First thing to do is create the SSL and its root with the following commands. Remember to change the IP in the example:
$params = @{
    Type = 'Custom'
    Subject = 'CN=SOLR-Root'
    KeySpec = 'Signature'
    KeyExportPolicy = 'Exportable'
    KeyUsage = 'CertSign'
    KeyUsageProperty = 'Sign'
    KeyLength = 2048
    HashAlgorithm = 'sha256'
    NotAfter = (Get-Date).AddMonths(60)
    CertStoreLocation = 'Cert:\LocalMachine\My'
}
$cert = New-SelfSignedCertificate @params
Now that the root is created, the certificate is needed:
$params = @{
       Type = 'Custom'
       Subject = 'CN=SOLR'
       KeySpec = 'Signature'
       KeyExportPolicy = 'Exportable'
       KeyLength = 2048
       HashAlgorithm = 'sha256'
       NotAfter = (Get-Date).AddMonths(60)
       CertStoreLocation = 'Cert:\LocalMachine\My'
       Signer = $cert
       TextExtension = @(
        '2.5.29.37={text}1.3.6.1.5.5.7.3.2,1.3.6.1.5.5.7.3.1',
        '2.5.29.17={text}DNS=my-domain.com&IPAddress=10.11.12.13')
   }
New-SelfSignedCertificate @params
Use MMC to move these two new items to the Trusted Root Certificate Authorities, and export the root, setting the password as "secret".
Copy the exported PFX file to the etc folder in SOLR (E:\Apps\solr-8.11.2\server\etc).
Open the solr.in.cmd file (E:\Apps\solr-8.11.2\bin\solr.in.cmd) and uncomment/enter the following lines:
set SOLR_SSL_KEY_STORE=etc/solr.pfx
set SOLR_SSL_KEY_STORE_PASSWORD=secret
set SOLR_SSL_KEY_STORE_TYPE=PKCS12
set SOLR_SSL_TRUST_STORE=etc/solr.pfx
set SOLR_SSL_TRUST_STORE_PASSWORD=secret
set SOLR_SSL_TRUST_STORE_TYPE=PKCS12
You're good to go now, but let's get SOLR running.
Install Solr as a Service
Download and extract NSSM (I extracted it to E:\Apps\nssm-2.24) and run the following command:
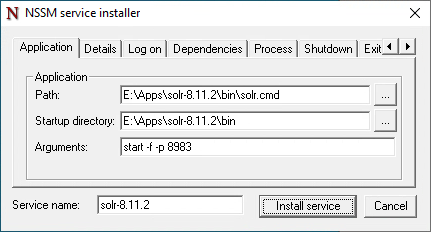
"E:\Apps\nssm-2.24\win64\nssm" install solr-8.11.2
The following screenshots show the values I have entered in this case:

Click install, start and test at https://10.11.12.13:8983/solr/#/, or whatever your IP is.
Copying Sitecore and Setting up IIS
The easiest part of this task will be to set up IIS. Assuming a new VM with nothing set, we'll need to perform the following steps:
- Install the root PFX from earlier, and placing it once again under the trusted area in MMC. You can also visit the SOLR URL before proceeding to make sure it's accessible.
- In add/update features, ensure HTTP Activation is enabled under the .NET 4.8 node.
- Install IIS Url Rewrite Module 2 for IIS, or you may get an error later, HTTP Error 500.19 for Module “ IIS Web Core”.
- Make a backup of Webroot in the original server, and copy that to the new one (I'm using the path E:\WebApps\Sitecore).
- Update the ConnectionStrings.config file to point to the new databases, to avoid any obvious issues.
- Check the web.config file or other configs to see if you need to change role definitions.
- Clear the log folder.
- Add a new site in IIS, pointing to the directory you extracted to. I named my site, "Sitecore".
- Assign any bindings you need for your site(s).
- Assign full permissions to the extracted webroot folder for the user, “iis apppool\sitecore”.
- Open the log folder and visit the site's URL to kick off a first run, and check to ensure the site is error free.
- Log in to Sitecore and check the indexes are appearing correctly in the control panel.
- Do a full site republish and rebuild indexes.


