
2Dec, 2019
A Complete Code Sample for Creating Your Own Custom Sitecore Log
An old staple of Sitecore development is a custom logger. Yes, log file analyzers are great like we saw in my previous post, but sometimes you just want that special log where the entries are all yours. They're just for you. It's your own VIP room. Your own “members only” area, where all you see is only what you want to see. Ok enough, let's get started.
As you probably know, Sitecore generates a series of log files for specific purposes, and like a lot of applications Sitecore makes use of Log4Net to write events to these files. The information Sitecore writes is of course, very useful and an essential tool for us developers, but I'm not going to deny the desire to have custom files from time to time.
An excellent example of a custom log file being used is with integrations or a critical scheduled task. If I get a report that something's not right with an operation I want to drive straight to my dedicated log file instead of searching through the main log. It's a lot faster and when there's a measure of stress, you'll be glad you have it.
For this demo we're going to have a clean operation run on start-up. Let's pretend there's a series of items that need to be removed for some reason due to an integration. To be honest this isn't a real operation but it's useful for our needs, and it works.
In the following config file we have an Appender, Logger, and a Pipeline. There should be a lot here you recognize from Log4Net documentation, and note that the pipeline is just a means of the demo and not needed to write to the log.
<?xml version="1.0" encoding="utf-8"?>
<configuration xmlns:patch="http://www.sitecore.net/xmlconfig/">
  <sitecore>
    <log4net>
      <appender name="SitecoreFundamentalsLogFileAppender" type="log4net.Appender.SitecoreLogFileAppender, Sitecore.Logging">
        <encoding value="utf-8" />
        <staticLogFileName value="true"/>
        <datePattern value=".yyyyMMdd.'log'" />
        <rollingStyle value="Date" />
        <lockingModel type="log4net.Appender.FileAppender+MinimalLock" />
        <file value="$(dataFolder)/logs/sitecorefundamentals.log.{date}.txt"/>
        <appendToFile value="true"/>
        <layout type="log4net.Layout.PatternLayout">
          <conversionPattern value="%4t %d{ABSOLUTE} %-5p %m%n"/>
        </layout>
      </appender>
      <logger name="SitecoreFundamentals.Logs" additivity="false">
        <level value="INFO"/>
        <appender-ref ref="SitecoreFundamentalsLogFileAppender"/>
      </logger>
    </log4net>
    <pipelines>
      <initialize>
        <processor type="SitecoreFundamentals.Demos.PipelineDemo, SitecoreFundamentals.Demos" >
          <StorageRoot>{110D559F-DEA5-42EA-9C1C-8A5DF7E70EF9}</StorageRoot>
        </processor>
      </initialize>
    </pipelines>
  </sitecore>
</configuration>
Now that our appender and logger are in place, we need to have that pipeline do something with it. The following example will write to the new log with a simple entry on startup.
using System.Reflection;
namespace SitecoreFundamentals.Demos
{
    public class PipelineDemo
    {
        public string StorageRoot { get; set; }
        public void Process(Sitecore.Pipelines.PipelineArgs args)
        {
            var logger = Sitecore.Diagnostics.LoggerFactory.GetLogger("SitecoreFundamentals.Logs");
            logger.Info($"[{GetType().FullName}.{MethodBase.GetCurrentMethod().Name}] -> Performing startup clean operation in {StorageRoot}");
        }
    }
}
Ansd here's what we get in our sitecorefundamentals.log.20190321.txt file:
2644 21:51:51 INFO [SitecoreFundamentals.Demos.PipelineDemo.Process] -> Performing startup clean operation in {110D559F-DEA5-42EA-9C1C-8A5DF7E70EF9}
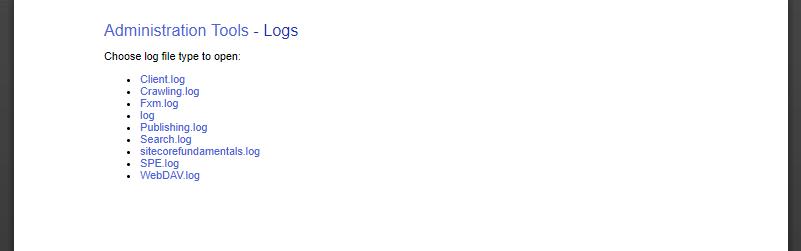
Using the Sitecore Log Viewer
One thing to note, is your custom log files will not appear in /sitecore/admin/Logs.aspx if you put them in a sub folder. If you don't use this tool then you're all good and sub folder away, but below you can see sitecorefundamentals.log in the root which is where I placed it.